Call Authentication
Pre-requisites
- First Orion Branded Communications agreement
- Access to First Orion Customer Portal
- Vetted and Approved Business
- Ability to originate phone calls from configured phone numbers in calling platform
- Understanding of current calling platform and environment to integrate required API
Steps
The following steps detail the process of configuring a INFORM with Call Authentication Program in the First Orion platform.
Step 1 - Login to First Orion Portal
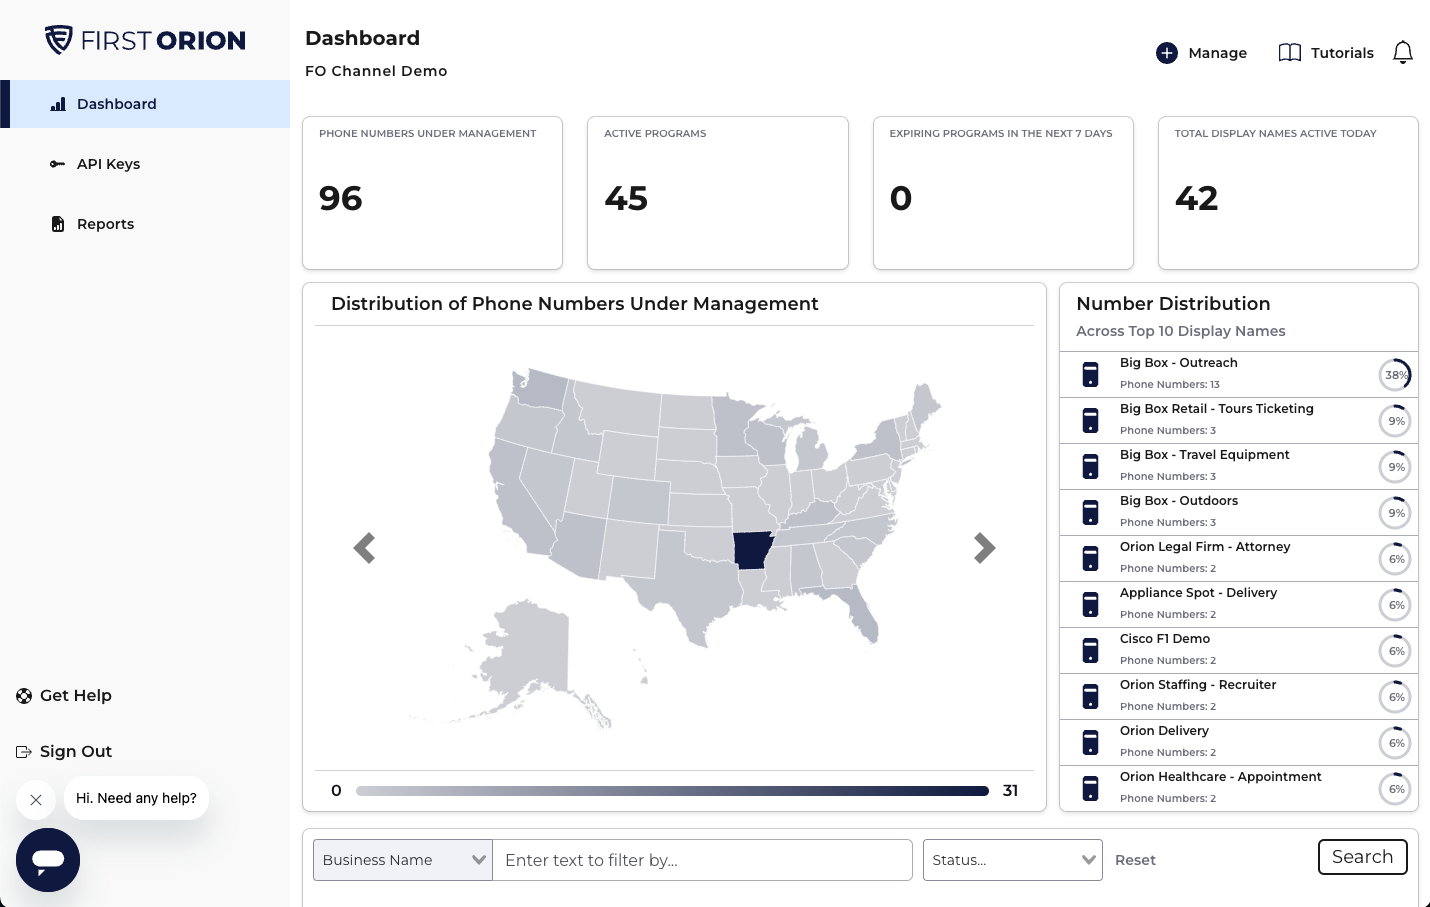
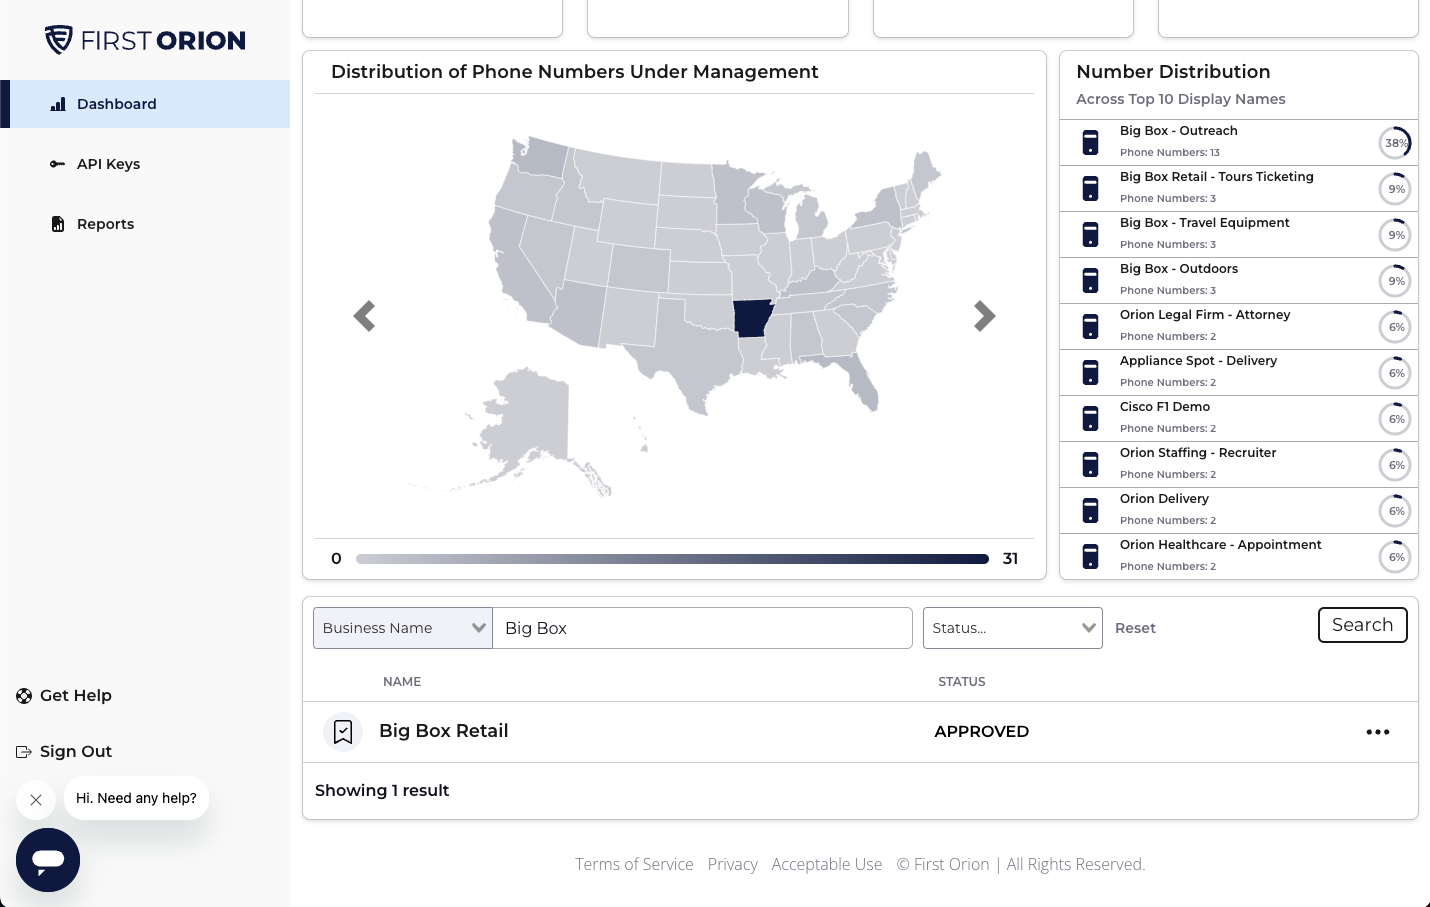
Step 2 - Locate Business
- Scroll down to the list of businesses
- Search based on Business Name or Business ID
- Click on the business
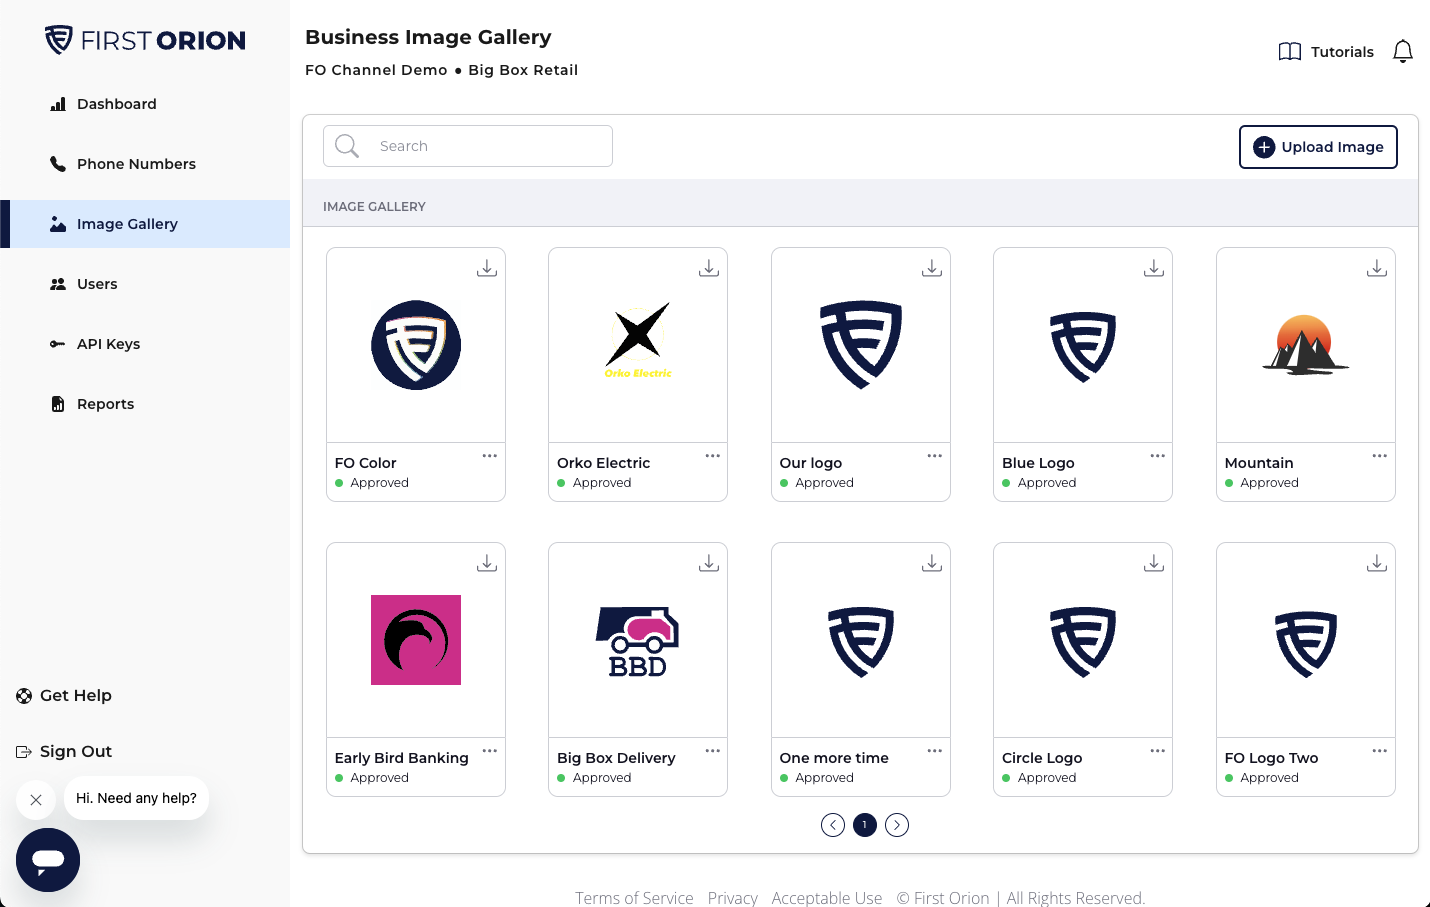
Step 3 - (Optional) Add Logo to Image Gallery (for new images)
If you are not using INFORM with Logo, skip to Step 4
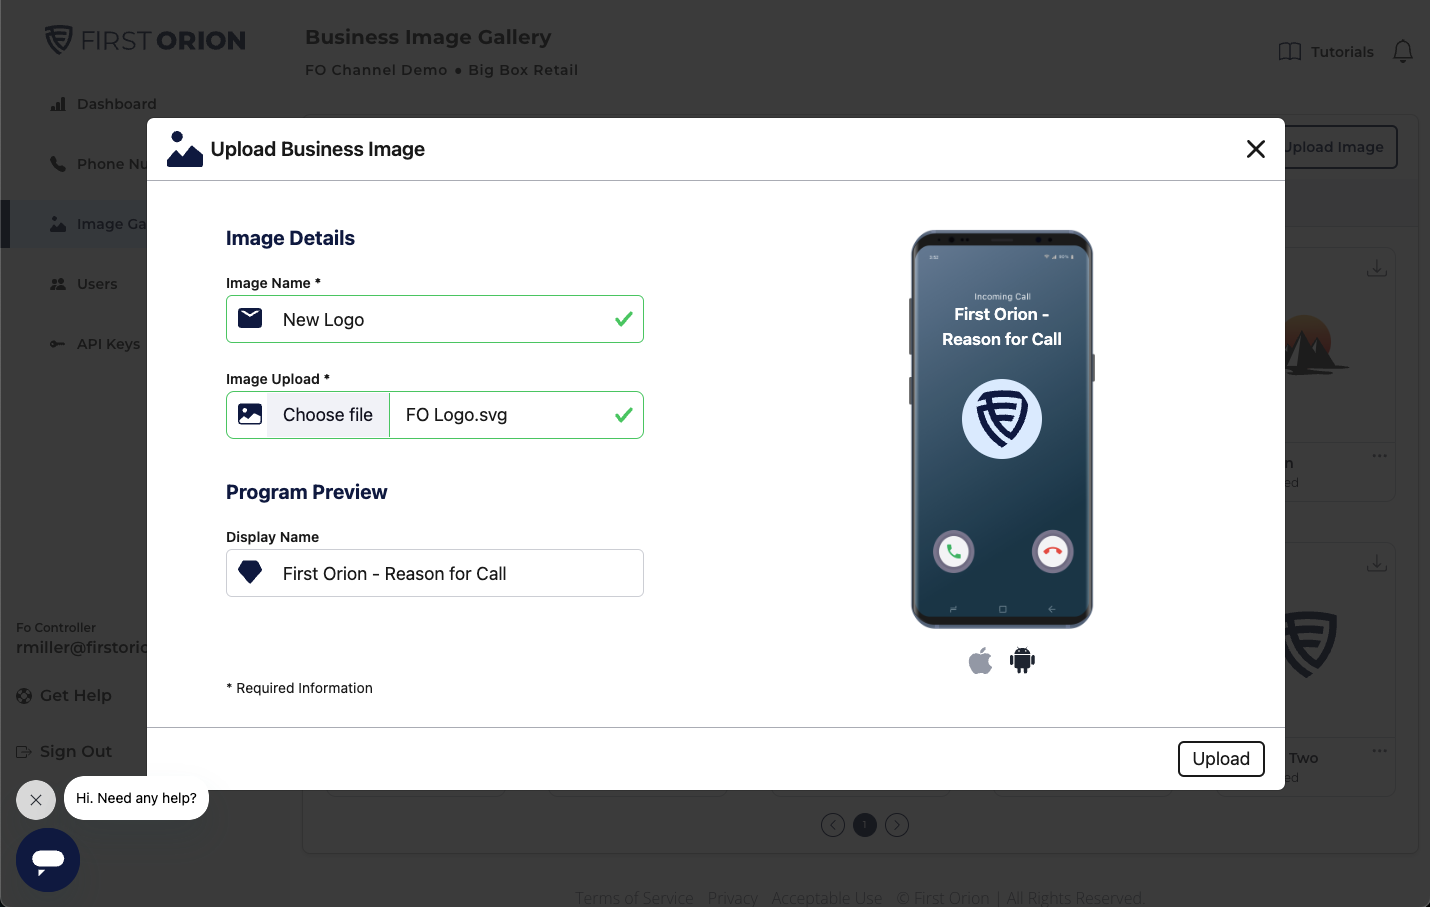
- Navigate to Image Gallery
- Upload and SVG that adheres to the file restrictions.
Step 4 - Setup Program
INFORM with Call Authentication
- Navigate to the Business Unit level.
- Click Manage in the top right.
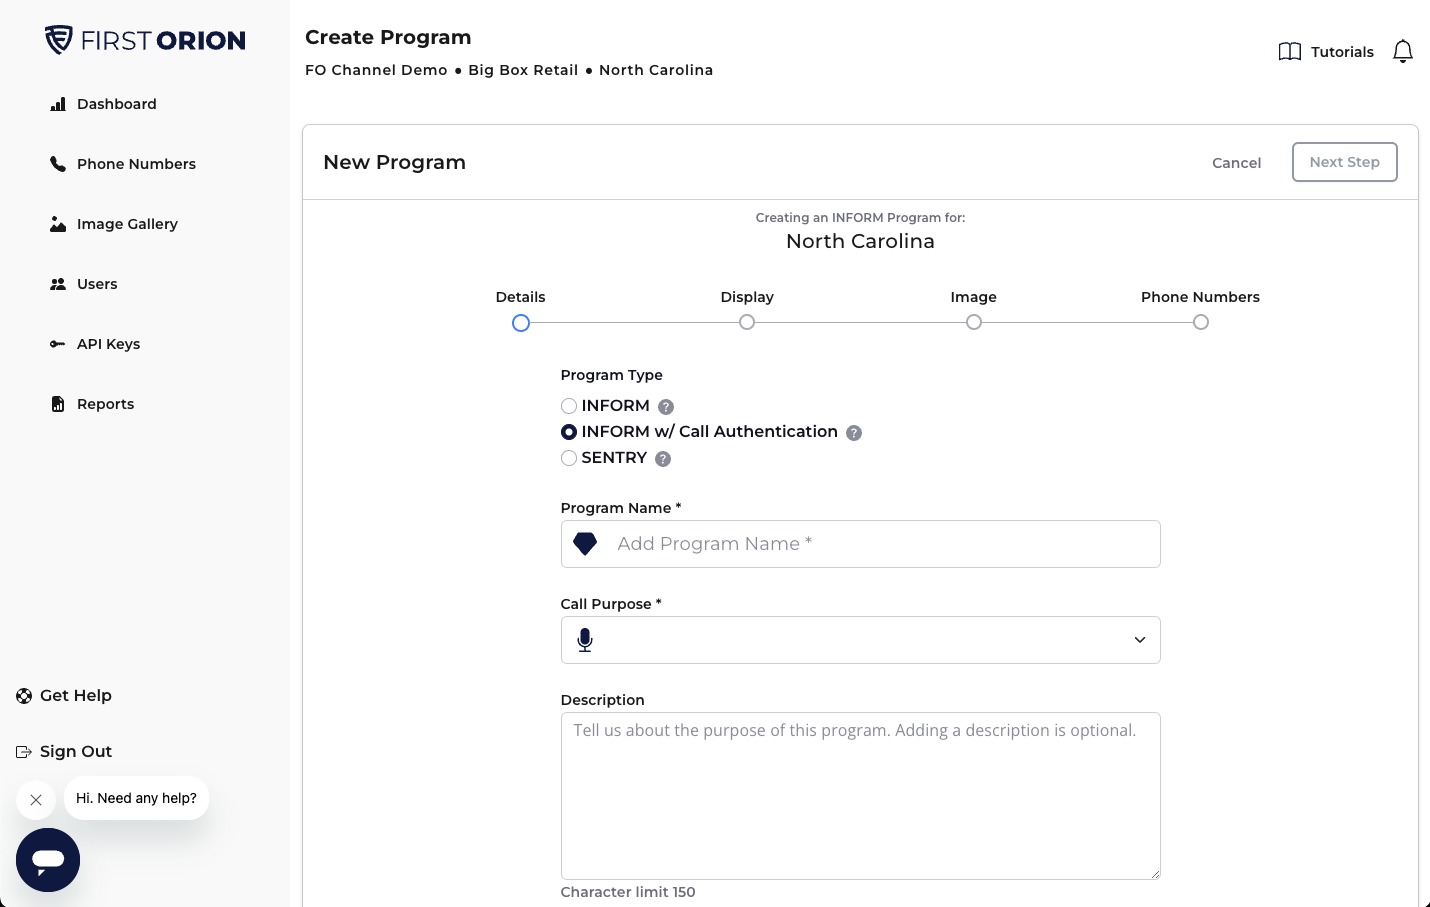
- Click Create Program.
- Select the "INFORM w/ Call Authentication" program type.
- Name the program and select the call purpose.
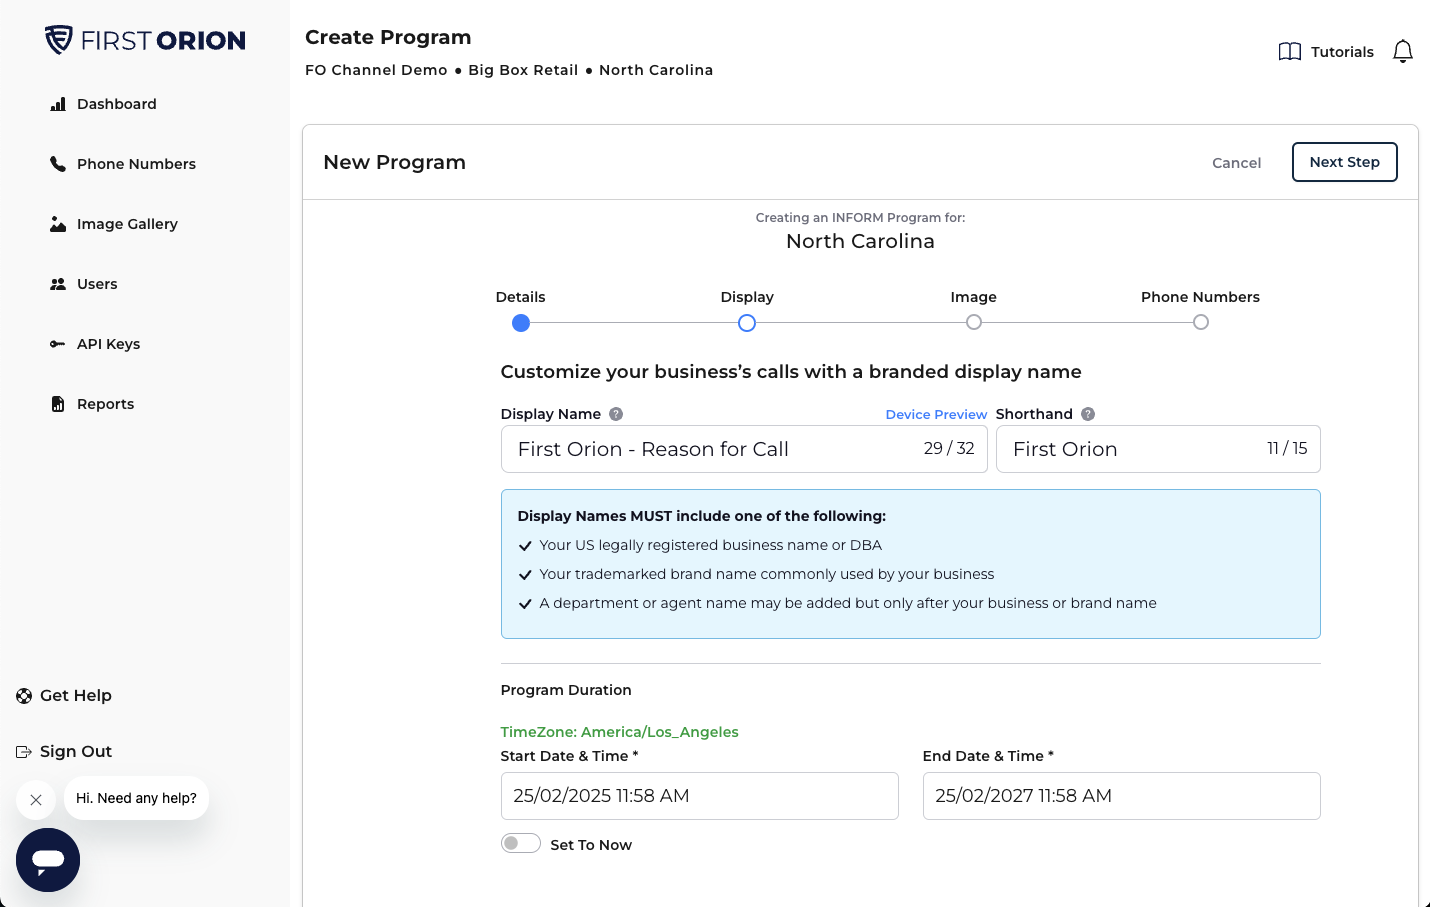
- Click into Display to add the text display and the program duration.
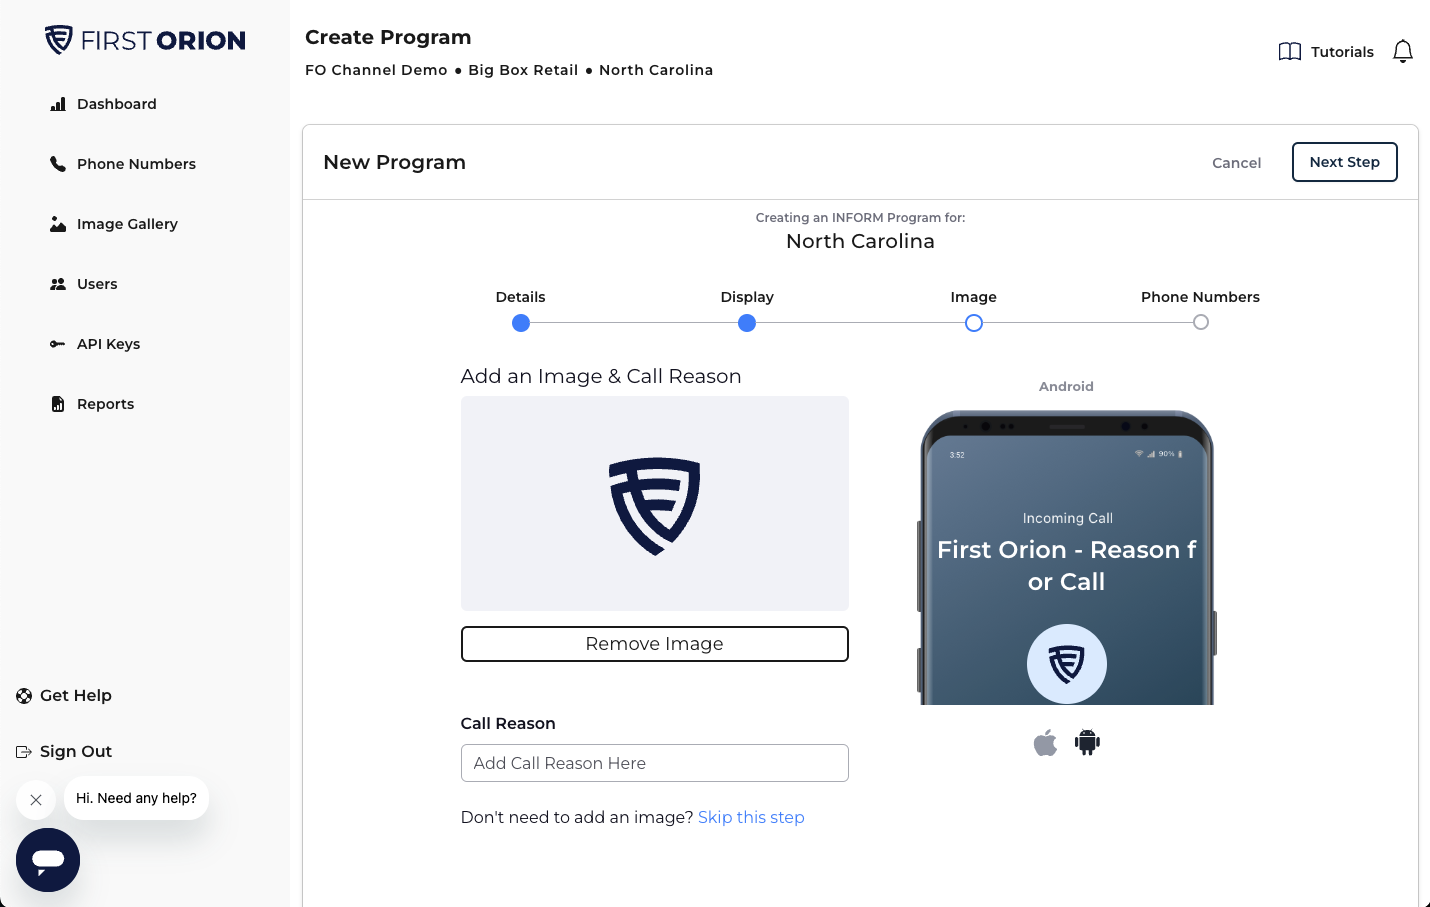
- Note - skip the "Image" step to ensure the Program is not created as INFORM with Logo
- Click into Phone Numbers to add numbers for branding.
- Click Launch.
INFORM with Logo
- Navigate to the Business Unit level
- Click Manage in the top right
- Click Create Program
- Select the "INFORM w/ Call Authentication" program type.
- Name the program and select the call purpose.
- Click into Display to add the text display and the program duration.
- Click into Image and select the previously uploaded image.
- Click into Phone Numbers to add numbers for branding.
- Click Launch
Sentry
- Navigate to the Business Unit level
- Click Manage in the top right
- Click Create Program
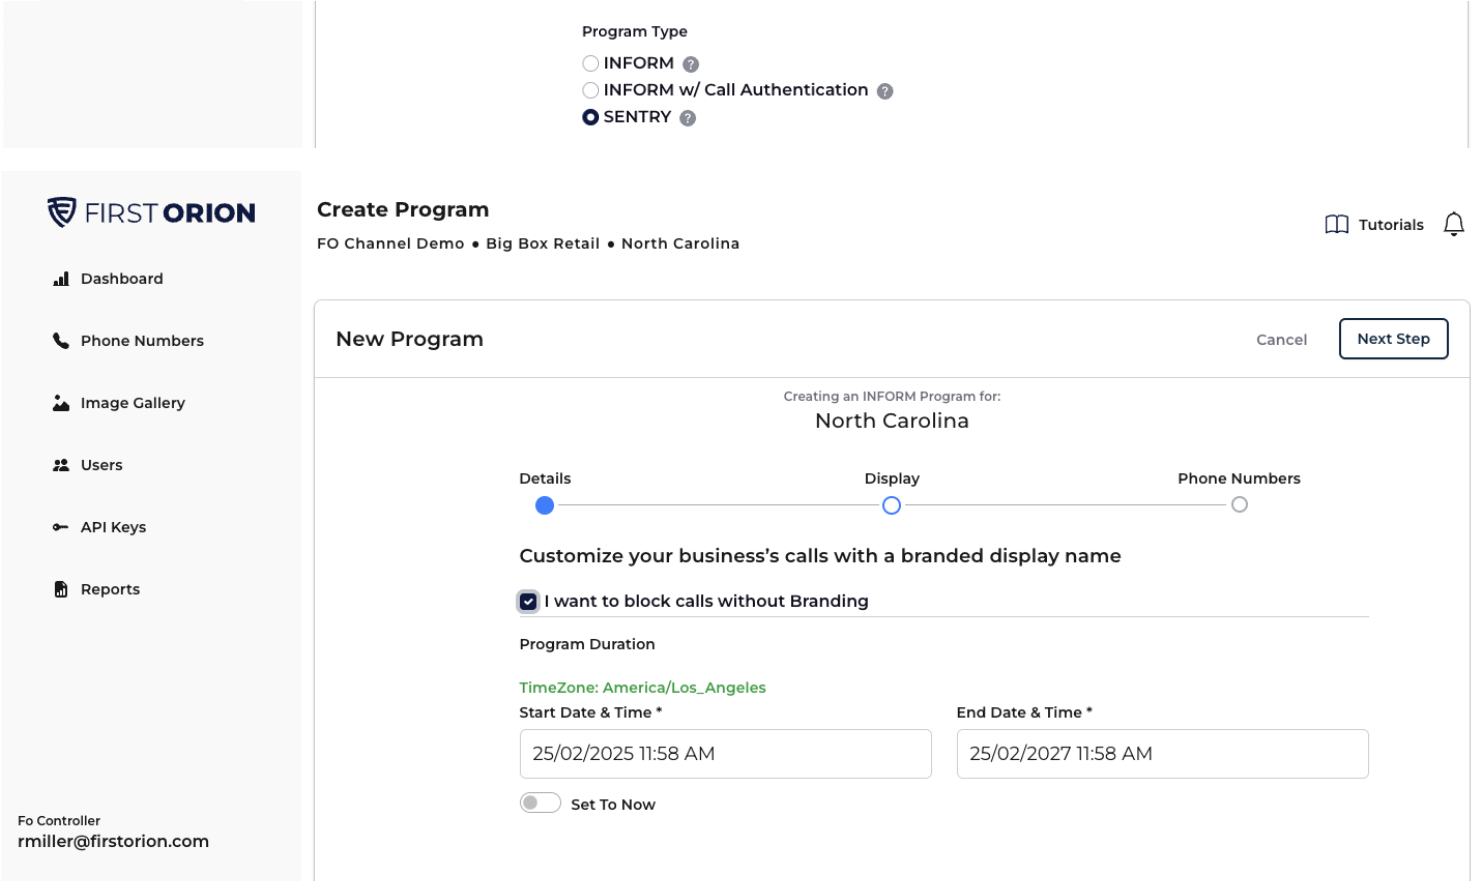
- Select the SENTRY program type.
- Name the program and select the call purpose.
- Click into Display. Set program duration then either toggle branding off (just shows phone number) or add the text display.
- Click into Phone Numbers to add numbers for Sentry.
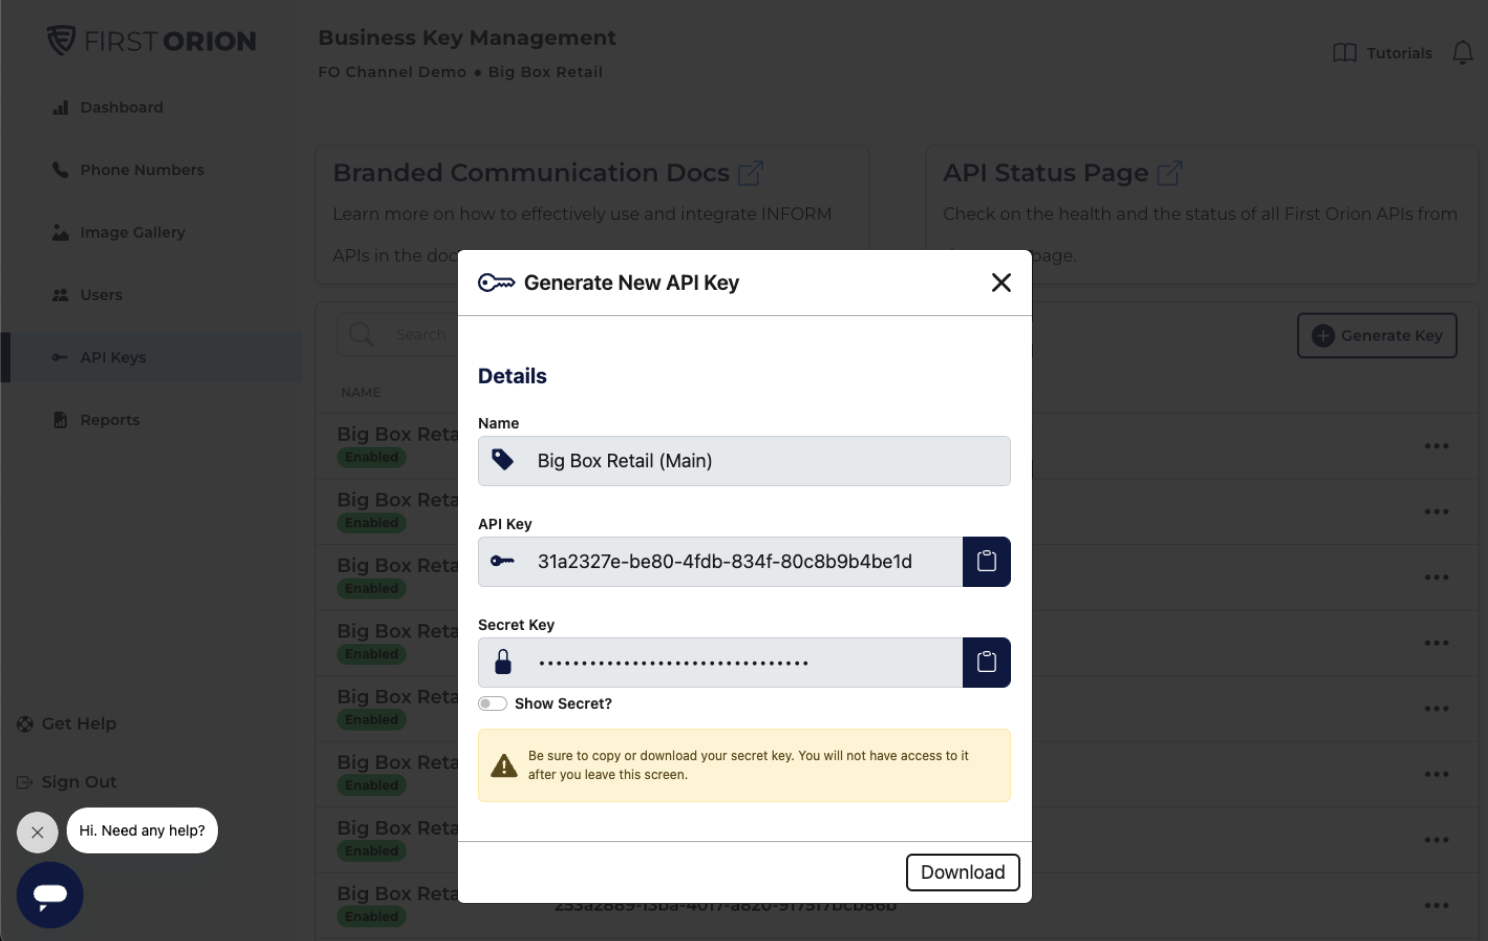
Step 5 - Generate API Keys
- Navigate to the API Keys section on the left hand side.
- Click Generate Key to generate the new key.
- Copy and save or download the generated keys.
Step 6 - Integrate INFORM with Call Authentication API
- Verify being able to generate an access token.
curl --location --request POST 'https://api.firstorion.com/v1/auth' \
--header 'X-API-KEY: [API KEY FROM PORTAL]' \
--header 'X-SECRET-KEY: [SECRET KEY FROM PORTAL]' \
--header 'X-SERVICE: auth' \
--header 'accept: application/json'- Verify being able to make an INFORM with Call Authentication API push.
curl --location 'https://api.firstorion.com/exchange/v1/calls/push' \
--header 'authorization: Bearer [FROM GET TOKEN ENDPOINT]' \
--header 'content-type: application/json' \
--data '{
    "aNumber": "+18668561234",
    "bNumber": "+15019515678"
}'- Identify where in the platforms call flow this can live and integrate it.
Example Javascript below.
// Libraries
const axios = require('axios'); // Install with,  npm install axios

// Gets First Orion Auth Token
const getToken = async () => {

    try {
      const response = await axios.post(
        'https://api.firstorion.com/v1/auth',
        null,
        {
          headers: {
            'X-SERVICE':'auth',
            'X-API-KEY': 'your-api-key',
            'X-SECRET-KEY': 'your-secret-key',
            'Content-Type': 'application/json'
          }
        }
      );
      return response.data.token;

    } catch (error) {
      console.error('Error:', error);
      return {
        statusCode: error.response ? error.response.status : 500,
        body: JSON.stringify({ error: error.message })
      };
    }
}

// Create INFORM with Call Authentication push to First Orion for INFORM with Call Authentication
// Find out more at: https://developer.firstorion.com/firstorion-public/reference/callauthentication
const push_callauth = async (token) => {
    let data = JSON.stringify({
        "aNumber": '+15555555555',
        "bNumber": '+15554444444'
    });

    let config = {
        method: 'post',
        url: 'https://api.firstorion.com/exchange/v1/calls/push',
        headers: {
            'Authorization': token,
            'Content-Type': 'application/json'
        },
        data : data
    };

    axios.request(config)
    .then((response) => {
        console.log(JSON.stringify(response.data));
    })
    .catch((error) => {
        console.log(error);
    });
}

// Replace this Create Call function based on your platform
// Download the helper library from https://www.twilio.com/docs/node/install
// Set environment variables for your credentials
// Read more at http://twil.io/secure
const createCall = async () =>{
  const accountSid = "yourAccountSid";
  const authToken = "youAuthToken";
  const client = require("twilio")(accountSid, authToken);

  client.calls.create({
    url: "http://demo.twilio.com/docs/voice.xml",
    to: "+15555555555",
    from: "+15554444444",
  })
  .then(call => console.log(call.sid));
}


// Main function to invoke the push for INFORM with Call Authentication.
const main = async () => {
    const token = await getToken();
    await push_callauth(token);
    await createCall();

}

main()
import json
import requests
import os
def get_token():
url = "https://api.firstorion.com/v1/auth"
headers = {
'X-SERVICE': 'auth',
'content-type': 'application/json',
'X-API-KEY': 'your-api-key',
'X-SECRET-KEY': 'your-secret-key'
}
response = requests.request("POST", url, headers=headers)
data = response.json()
return data['token']
def push_precall(token):
url = "https://api.firstorion.com/exchange/v1/calls/push"
payload = json.dumps({
"aNumber": "+15555555555",
"bNumber": "+15554444444"
})
headers = {
'Authorization': token,
'Content-Type': 'application/json'
}
response = requests.request("POST", url, headers=headers, data=payload)
data = response.json()
value = {
'statusCode': response.status_code,
'body': data['body']['message']
}
# Return JSON Object
return json.loads(json.dumps(value))
# Replace this Create Call function based on your platform
# Download the helper library from https://www.twilio.com/docs/python/install
# Set environment variables for your credentials
# Read more at http://twil.io/secure
import os
from twilio.rest import Client
def createCall():
account_sid = "your_account_sid"
auth_token = "your_auth_token"
client = Client(account_sid, auth_token)
call = client.calls.create(
url="http://demo.twilio.com/docs/voice.xml",
to="+15555555555",
from_="+15554444444"
)
print(call.sid)
# Makes the pre-call push.
token = get_token()
precall = push_precall(token)
# Log pre-call push
print("Pre-call Status: " +str(precall["statusCode"]))
print("Pre-call Message: " +precall["body"])
createCall()// Libraries
const axios = require('axios'); // Install with, npm install axios
// Gets First Orion Auth Token
const getToken = async () => {
try {
const response = await axios.post(
'https://api.firstorion.com/v1/auth',
null,
{
headers: {
'X-SERVICE':'auth',
'X-API-KEY': 'your-api-key',
'X-SECRET-KEY': 'your-secret-key',
'Content-Type': 'application/json'
}
}
);
return response.data.token;
} catch (error) {
console.error('Error:', error);
return {
statusCode: error.response ? error.response.status : 500,
body: JSON.stringify({ error: error.message })
};
}
}
// Create Call Authentication push to First Orion for Call Authentication
// Find out more at: https://developer.firstorion.com/firstorion-public/reference/callauthentication
const push_callauth = async (token) => {
let data = JSON.stringify({
"aNumber": '+15555555555',
"bNumber": '+14155550100'
});
let config = {
method: 'post',
url: 'https://api.firstorion.com/exchange/v1/calls/push',
headers: {
'Authorization': token,
'Content-Type': 'application/json'
},
data : data
};
axios.request(config)
.then((response) => {
console.log(JSON.stringify(response.data));
})
.catch((error) => {
console.log(error);
});
}
// Set payload information and authorization credentials
// Read more at https://developer.vonage.com/en/api/voice#createCall
const createCall = async () => {
let data = JSON.stringify({
"to": [
{
"type": "phone",
"number": "14155550100"
}
],
"answer_url": [
"https://example.com/answer"
]
});
let config = {
method: 'post',
url: 'https://api.nexmo.com/v1/calls/',
headers: {
'Authorization': 'Bearer <Vonage JWT>',
'Content-Type': 'application/json'
},
data : data
};
axios.request(config)
.then((response) => {
console.log(JSON.stringify(response.data));
})
.catch((error) => {
console.log(error);
});
}
// Main function to invoke the Call Authentication push for Call Authentication.
const main = async () => {
const token = await getToken();
await push_callauth(token);
await createCall();
}
main()import json
import requests
import os
def get_token():
url = "https://api.firstorion.com/v1/auth"
headers = {
'X-SERVICE': 'auth',
'content-type': 'application/json',
'X-API-KEY': 'your-api-key',
'X-SECRET-KEY': 'your-secret-key'
}
response = requests.request("POST", url, headers=headers)
data = response.json()
return data['token']
def push_precall(token):
url = "https://api.firstorion.com/exchange/v1/calls/push"
payload = json.dumps({
"aNumber": "+15555555555",
"bNumber": "+14155550100"
})
headers = {
'Authorization': token,
'Content-Type': 'application/json'
}
response = requests.request("POST", url, headers=headers, data=payload)
data = response.json()
value = {
'statusCode': response.status_code,
'body': data['body']['message']
}
# Return JSON Object
return json.loads(json.dumps(value))
# Set payload information and authorization credentials
# Read more at https://developer.vonage.com/en/api/voice#createCall
def createCall():
url = "https://api.nexmo.com/v1/calls/"
payload = json.dumps({
"to": [
{
"type": "phone",
"number": "14155550100"
}
],
"answer_url": [
"https://example.com/answer"
]
})
headers = {
'Authorization': 'Bearer <Vonage JWT>',
'Content-Type': 'application/json'
}
response = requests.request("POST", url, headers=headers, data=payload)
data = response.json()
# Return JSON Object
return data
# Makes the pre-call push.
token = get_token()
precall = push_precall(token)
# Log pre-call push
print("Pre-call Status: " +str(precall["statusCode"]))
print("Pre-call Message: " +precall["body"])
createCall()Updated 5 months ago
Did this page help you?