

Twilio Flex - Call Authentication
Pre-requisites
- Annual Contract Agreement with First Orion Branded Communications (Post paid)
- Access to First Orion Customer Portal
- Vetted and Approved Business
- Twilio Flex access
Expectations
- Customer can facilitate changes to the Twilio Flex platform for configuration
- Access to Twilio Flex, Functions and Assets, and Task Router.
- Thorough testing involving customer and First Orion
- Proper lead time to schedule “go live” between customer and First Orion Pre-Requisites
Step 1: Create Service for Call Auth
Create Function
- In the Twilio Flex Account Dashboard, click Functions and Assets then click Services.
- Click the Create Service Button.
- Name it. Example, call-auth-service.
- This will create a domain (URL) for calling the function.
- Click on the call-auth-service then click Add + then Add Function
- This will create a path, named /callauth in example.
-
Paste in the code below and save the function.
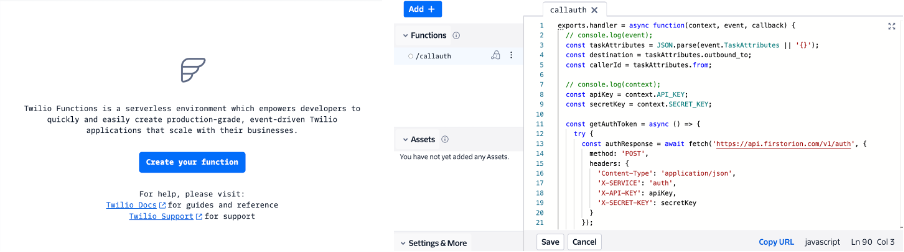
exports.handler = async function(context, event, callback) { // console.log(event); const taskAttributes = JSON.parse(event.TaskAttributes || '{}'); const destination = taskAttributes.outbound_to; const callerId = taskAttributes.from; // console.log(context); const apiKey = context.API_KEY; const secretKey = context.SECRET_KEY; const getAuthToken = async () => { try { const authResponse = await fetch('https://api.firstorion.com/v1/auth', { method: 'POST', headers: { 'Content-Type': 'application/json', 'X-SERVICE': 'auth', 'X-API-KEY': apiKey, 'X-SECRET-KEY': secretKey } }); if (!authResponse.ok) { throw new Error('Auth API successful.'); } // Parse the API response const apiData = await authResponse.json(); return apiData.token; } catch (error) { // Handle API or validation failure console.error('Auth API Error:', error.message); callback({ error: 'Failed to get Auth Token', message: error.message }); } }; // Call Auth try { // Get Auth Token const authToken = await getAuthToken(); // Call Auth Push const apiResponse = await fetch('https://api.firstorion.com/exchange/v1/calls/push', { method: 'POST', headers: { 'Content-Type': 'application/json', 'Authorization': `${authToken}` }, body: JSON.stringify({ aNumber: callerId, bNumber: destination }) }); // Check response if (!apiResponse.ok) { throw new Error(`API returned ${apiResponse.status}: ${await apiResponse.text()}`); } // Get response data const apiData = await apiResponse.json(); console.log('External API response:', apiData); // Setup instructions to make Twilio Phone Call const response = { instruction: "call", call: { to: destination, from: callerId } }; // Callback to start call callback(null, response); } catch (error) { console.error('Call Auth API Error:', error.message); callback({ error: 'Failed to validate call', message: error.message }); } }; -
Click on the Environment Variables and enter your First Orion information.
- API_KEY : Your-API-Key
- SECRET_KEY : Your-Secret-Key
-
Click Deploy All
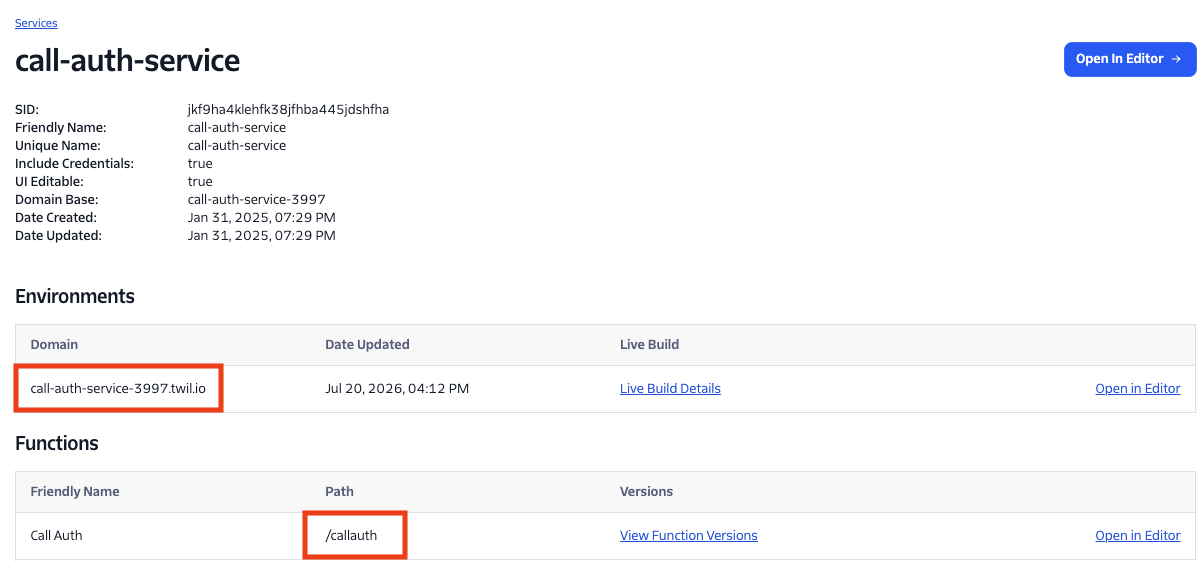
Save Service Details
We need to save the information to invoke the function.
- Click on Services under Functions and Assets.
- Click on "Service Details" for the function just created.
- Save the Domain and Path for later.
Step 2: Configure TaskRouter
These steps will allow your workspace to use the Call Auth function.
-
Click on Workspaces under TaskRouter.
-
Click on the desired workspace, Flex Task Assignment in example.
-
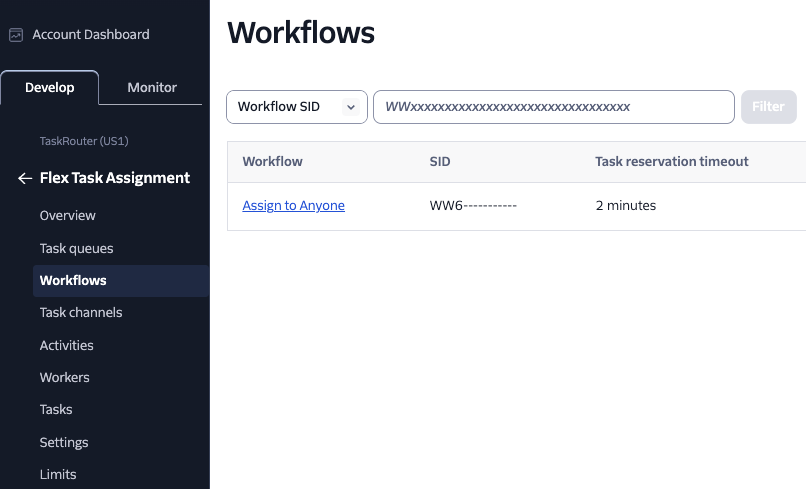
Click on Workflows under Workspace Name on the left. Then click the desired Workflow, Assign to Anyone in example.
-
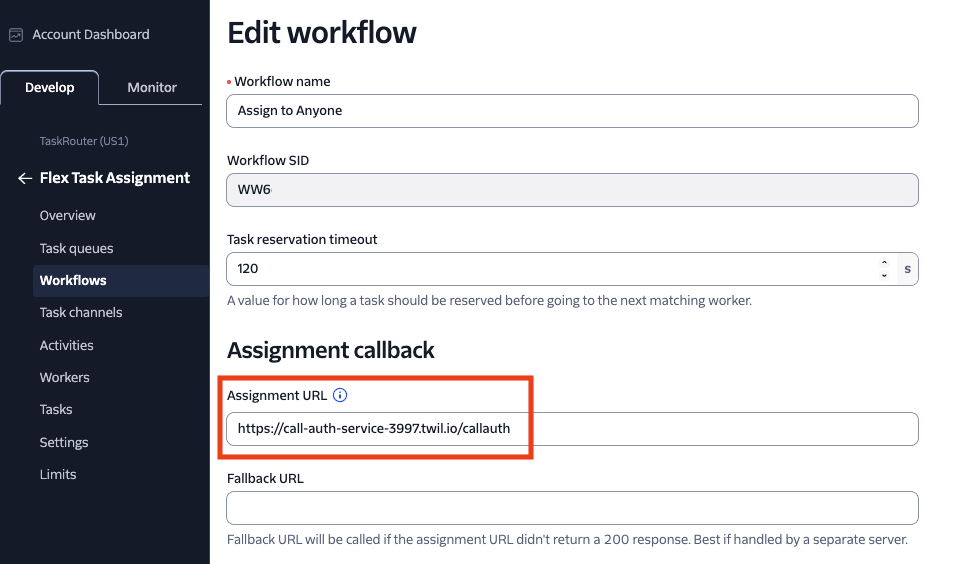
Add the Domain/Path to the Assignment callback.
-
https://call-auth-service-3997.twil.io/callauth, in example.
-
-
Save the workflow.
Step 3: Create Call Authentication Program
- See the Call Authentication Guide for detailed Program creation instructions.
- Add the Twilio Flex phone numbers into the Call Authentication Program.
Step 4: Make Phone Calls
Test phone calls from your Twilio Flex phone numbers that have been added to a Call Auth Program.
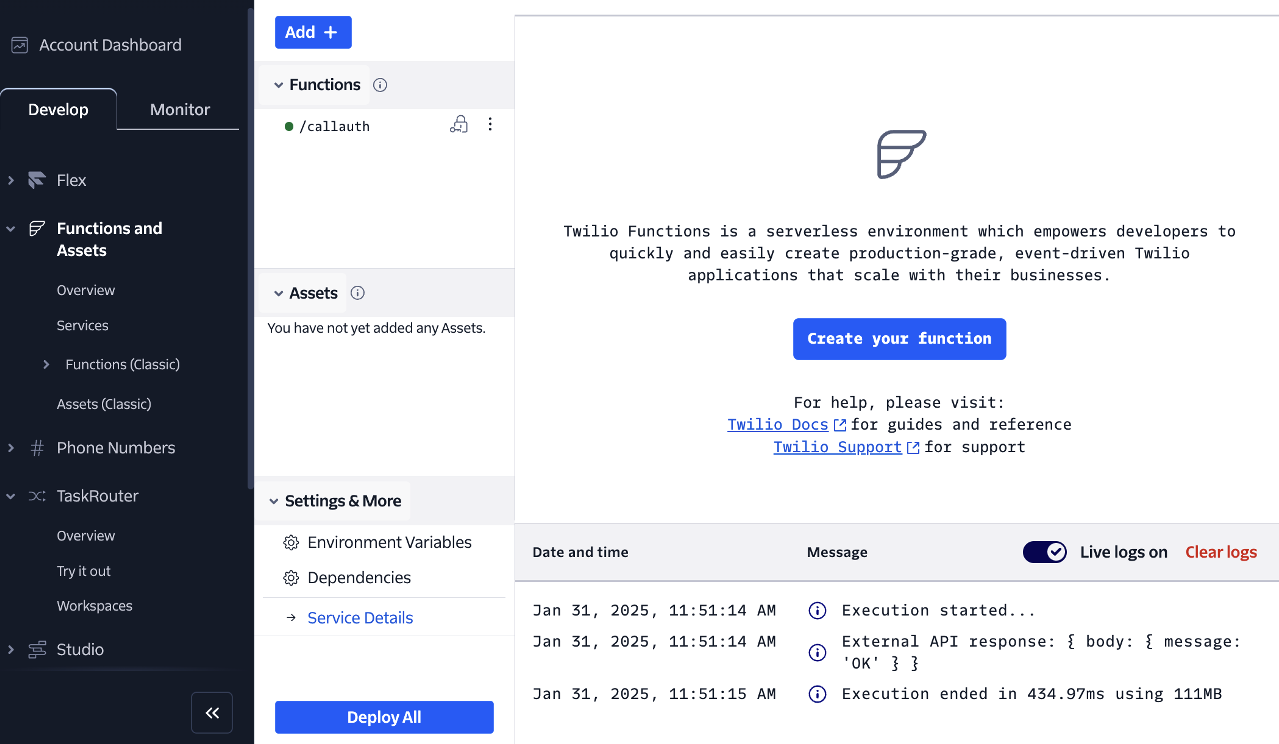
Troubleshoot Checklist
- Check Twilio Function Logs.
- Verify your Service Function is setup in your Workflow under TaskRouter.
- Check Branding approval.
- Check Call Authentication Program
- Verify Phone numbers are in a Call Authentication Program
Updated 3 months ago
Did this page help you?